Mostrando postagens com marcador free. Mostrar todas as postagens

domingo, 29 de novembro de 2015

A Lace Story - Ajur Cowl Pattern


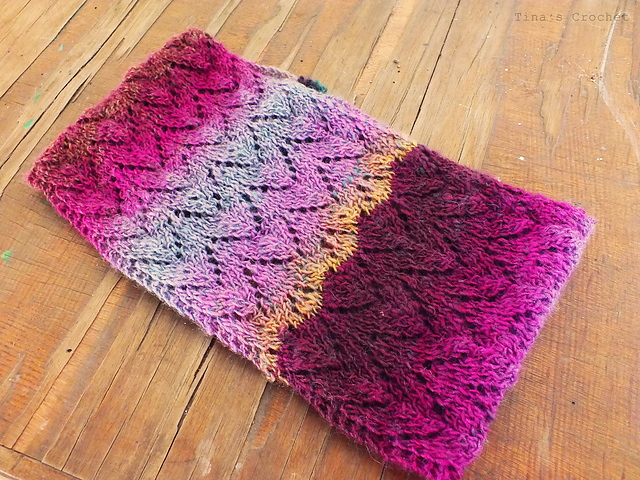
So, if you have read this blog before, you will know that looong ago, I started a lace scarf. A simple project using a stunning yarn.


I was my first time with lace. I have made eyelets and simple lace before, but this was an all lace project.  I had no idea how this would turn out like, but I was excited to use the Drops Delight yarn I got as a present from a friend who lives down under!!!

The search for the right pattern took me quite a while. I was not sure if I wanted to make a cowl or a scarf, but I soon said to myself - something simple, with no shaping. After all I would be having to pay attention to the lace!

So I settled for a scarf. I looked at Ravelry but nothing really caught me eye (Call me crazy!) so I went looking for patterns and stitches on some books both of my grannies have given me.

I finally found the right stitch at a book from the 80's! (I do think it's actually older than that, since it was definitely NOT the first edition!) It was a simple stitch, that is around online for ages (after I knew what to look for, there were thousands of different ways to do this.)

After making a few changes, I started. Not only I used a lifeline, I also used stitch markers. For a 44 stitch scarf!!! I give you the permission to laugh at my extreme caution :D If this is your first time with lace, I urge you to do the same! It will save you from lots of headaches later, trust me.

Lifeline and markers. Silly for such a small project, but highly effective!

I ended up finishing a 50gm skein, and I soon realized I had no more patience. At all. Scarves are great and fun.... Mostly when you are a begginer. Although  I'm pretty sure knitters who have far more experience than me love knitting scarves too. I just found out I need something that shows progress in a different way, and has at least a little bit of shaping. We live and we learn!

So I turned this into a cowl - I knitted a few more rows, and there it was. I actually have no idea why this didn't occurred me earlier - I love using cowls, scarves, not so much!
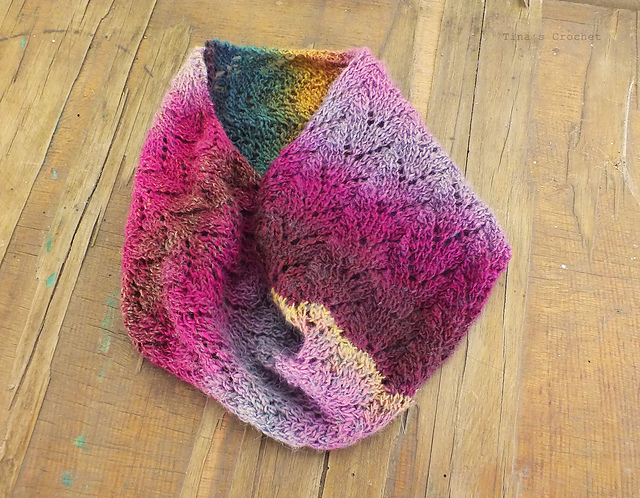


I'm quite happy with the result! So, here is the link for the pattern. You can use whatever needles and yarn you wish - there's not a gauge for this. In this cowl, I used 3.50mm needles and 1 skein of Drops Delight, 50gm. You can seam the sides and turn into a cowl, or you can just keep knitting and make a scarf! It's really up to what you prefer.

Keep in mind the stitch is not originally my idea! I'm actually trying to find information on the designer, so I can credit her/him properly. Keep your fingers crossed, I really want to find that person and say thank you :)

Have fun knitting this cowl/scarf! I can assure, it's great for begginers and experienced knitters alike!

Thanks for little sister, who took this photo!


Love,

Tina


segunda-feira, 10 de agosto de 2015

Hotpad/Potholder Pattern

I love making potholders and hotpads. Honestly, I love crochet for decoration... And since cooking is a little hobby of mine, filling the kitchen with my own creations is a must!

After I created the Círculo in a Square pattern, I knew I wanted to make something different with it. Not a blanket... Or to use it for a garment. Then it clicked - Decoration! For my kitchen! :)

Not only it looks cute, it's also useful. I do enjoy that!


Pattern 

I used the same yarn and hook I used to make the squares - Anne yarn and a 3.00m hook. 

Abbreviations:
sc- Single crochet stitch
Sl st - Slip stitch
st -Stitch
Ch - Chain
dc -Double crochet stitch

First, make 4 squares of the Círculo in a Square pattern. You can find the pattern here. Use the colors you wish!

After that, join them together - For this hotpad, I used a sc join. It's very simple - Just crochet the borders of the squares together with single crochet stitches. Use the color you wish - In my case, I used this bright blue color. It makes for a beautiful contrast with the white!

Border 

Round 1- With the desired color (Again, I used the same color I used for the join, but you can use your imagination!), Ch1. Then, sc around. In the corners of the squares, make 1 sc on the dc st before the 2ch - then ch3. Inside the 2ch space, make 1 sc. Continue the pattern like this - Sc in each st, make corner, sc in each st - Repeat around.

Round 2 - Sc around, but for the border, make: 1sc inside 3ch of previous round, ch3, sc inside ch3 of previous round. Repeat around.

Round 3 - Same as round 2. Then, weave ends.

After you are done with the border, join new yarn in the ch3 space of round 3. It can be whatever color you chose - I used white. Ch 25, then make a sl st inside the ch3 space. Weave ends, and it's ready to be used!


You can sell items made with this pattern, but do not sell the pattern itself. Do not claim as your own - if you want to feature in your site, please, link back to my blog. Copyright by Betina Juchem Clemens 2015. 

sábado, 8 de agosto de 2015

Almost Spring Hat Pattern

I present to you my very first knitting design!


When I got the yarn for my cowl, mom loved the color I chose. She kept asking me to knit a hat for her since last year, so... I thought now was the perfect time! I had the right color, all I needed was a pattern. After talking to her (she had a lot of ideas, mind you), I was able to start creating the design. And here it is!

What you will need -

For the hat:
Worsted weight yarn, 1 skein
3.50 mm needles, DPNS or circular (size of needles can be changed to adjust gauge)
Needle for sewing in ends

For the flower:
Worsted weight yarn
5mm hook
Needle to sew the flower on hat.


Notes:

**To make garter stitch in the round, purl one row, and then knit another row. Simple as that!

**When you are making the crown, you can skip the garter row if you want to, and just knit. But, if you want to continue the pattern, and find yourself having to decrease in a purl row, do not despair: Follow the exact same instructions, only switching the K for the P. So, instead of K6, you P6 - And instead of K2tog, just P2tog.

**You can use circular needles - Just make sure to have dpns of the same size for when you are making the crown!

Abbreviations:
CA - Cast on
K - Knit
P - Purl
sts - Stitches
K2tog - Knit 2 stitches together
Ch - Chain
Sk - Skip
dc - Double Crochet
sc - Single Crochet

Gauge:10cm - 18sts (In stockinette)  

Pattern:

Hat-

Cast on 96 sts, and divide them across 3 needles (32 sts on each needle.)

Make 13 rounds of K2, P2 ribb. (If you do not want to fold the ribb, make less rounds)

K for 8 rounds, make one round of garter. K for another 8 rounds, another one round of garter. Repeat until you have 15/16 cm.

Crown

K6, k2tog around
K one round
k5, k2tog around
K one round
K4, k2tog around
K one round
K3, k2tog around
K one round
K2, k2tog around
K one round
K1, k2tog around
K one round
K2tog around

Do not bind off - Thread yarn in the sewing needle and then pass the needle inside all remaining sts. Give it a tigh pull to close the top of the hat, then sew all ends.

Flower -

Ch 48. Sk1, sc, sk1, 5dc in same ch, repeat. When you are done, fold. This will form the flower. Attach to the hat and you are done!


You can sell items made with this pattern, but do not sell the pattern itself. Do not claim as your own - if you want to feature in your site, please, link back to my blog. Copyright by Betina Juchem Clemens 2015.